
When people ask us how to make a bracelet at home, after reviewing the most common questions buyers send us before their first kit arrives, one thing is clear: the problem isn’t the steps—it’s not knowing what you actually need before you start.
This guide covers that. We’ll tell you which bracelet type makes the most sense to try first, exactly what materials to get, and the one knot that determines whether your bracelet lasts a week or falls apart in ten minutes. If you want to make your own bracelet at home but have zero experience, this is where to start.
What kind of bracelet can you actually make at home?
There are dozens of bracelet styles out there — macramé, woven thread, wire-wrapped, and knotted cord. Most of them require either specific tools, a learning curve that takes real time, or both.
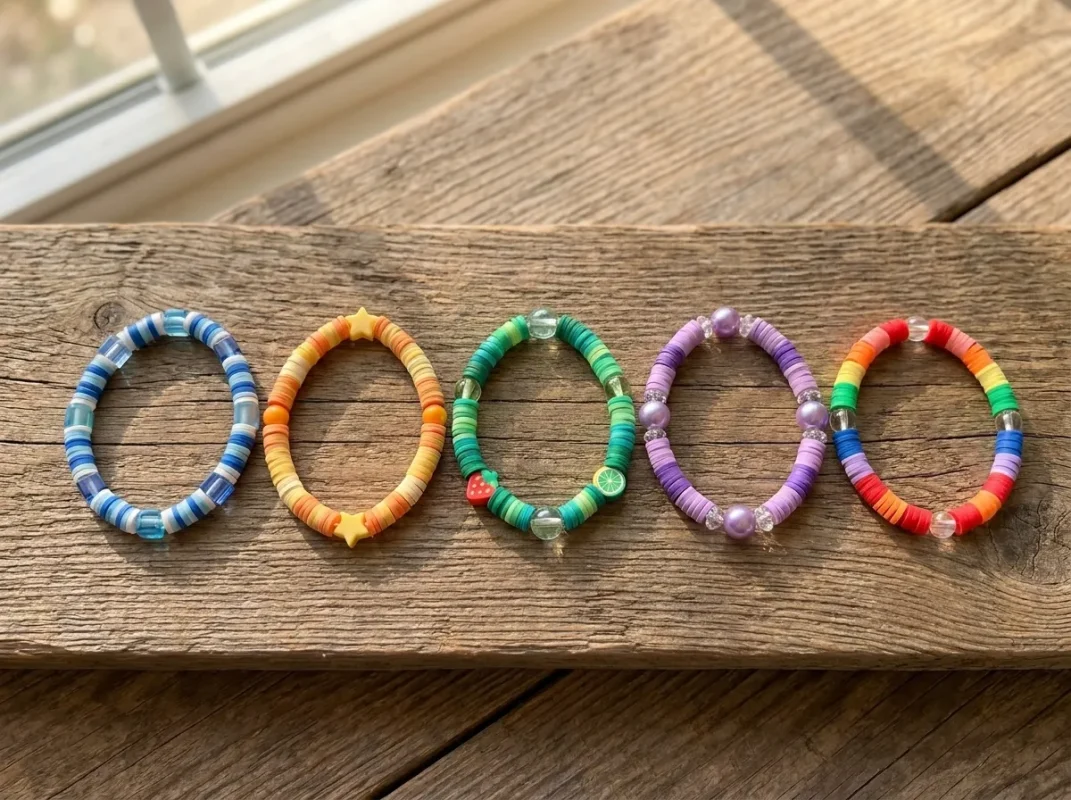
For a first DIY project, one type consistently works: the beaded stretch bracelet. You thread beads onto elastic cord, tie one knot, and you’re done. No loom, no clasp hardware, no special skills. The finished bracelet looks polished, fits any wrist, and takes most people under 20 minutes on their first attempt.
Everything in this guide is about that style. Once you’ve made one, the others are easier to approach.
What you need — and what you don’t
You only need four things for bracelet making at home. The temptation is to overprepare—don’t.
- Elastic cord — 0.8mm thickness. This is the most important decision in the whole process. When we were sourcing materials for our Beadlo kits, we tested over two dozen cord types. We found that standard 0.5 mm craft store cord snapped frequently within the first week of wear, especially with slightly heavier beads. Look specifically for 0.8 mm—it has the tensile strength to survive daily stretching without being too thick to knot.
- Beads. For a first bracelet, 6mm to 8mm acrylic or clay beads are the easiest to work with — the holes are large enough that the cord passes through without a needle. Avoid seed beads for your first attempt; the holes are tiny and the process is significantly slower.
- Small scissors. Any pair that makes a clean cut works fine.
- Something to stop the beads from sliding off. A binder clip attached 2 inches from one end of the cord. That’s it.
You don’t need a needle (with a 0.8 mm cord and standard beads, you thread by hand), a bracelet-making board, clasps, or pliers.
Watch it first: a video walkthrough
If you’re a visual learner, watching one run-through before you start makes the steps click faster. The video below shows the full process — from cutting the cord to tying the final knot — using the same beaded stretch bracelet method we describe here.
Step-by-step: how to make a bracelet at home with beads
Step 1—Cut the cord Wrap the cord loosely around your wrist and note the length. Add 4 inches (10 cm) to that measurement, then cut. The extra length is for tying the knot. For most adults, 11–12 inches total is right. For children ages 6–10, 9–10 inches is usually enough.
Don’t stretch the cord before you start—quality 0.8 mm elastic doesn’t need pre-stretching, and doing it unnecessarily reduces the cord’s lifespan.
Step 2 — Clip one end Attach a binder clip about 2 inches from one end. This acts as your stopper so beads don’t slide off while you’re threading. If you don’t have a binder clip, wrap a small piece of masking tape around the end instead.
Step 3—Thread your beads Start adding beads. If you’re spelling a name or word with letter beads, lay them out on the table in order first—it’s easier than re-threading if you get the sequence wrong.
A buyer recently asked us, “How many beads do I actually need for an adult wrist?” In our daily kit-packing experience, a standard 7-inch adult wrist typically requires about 28 to 30 of our 6 mm beads. Keep adding beads until the beaded section fits comfortably around your wrist without pulling tight.
Step 4 — Tie the Surgeon’s Knot A standard single knot will slip. The surgeon’s knot is the one that holds on a stretch bracelet. Here’s how:
Remove the binder clip. Hold one end of the cord in each hand. Cross the right end over the left and tuck it under—exactly like the first move of tying a shoe (often built on the foundation of a basic, but with an extra twist). Pull gently. Then cross the right over the left again, but this time tuck it under twice before pulling. Pull both ends firmly until you feel the knot lock. That’s it.
Trim the remaining cord, leaving about 2 mm of tail—enough to prevent the knot from unraveling but short enough to hide. Slide the nearest bead directly over the knot to conceal it.
Step 5 — Check the fit and wear it Slide the bracelet onto your wrist. It should stretch over your hand without feeling like it’s about to snap and sit comfortably without spinning loosely. If it’s too tight, you need to add one or two beads and re-tie. If it’s too loose, remove a bead or two.
The mistakes that kill a DIY bracelet at home
- Using the wrong cord thickness. If you picked up 0.5mm cord because it was what the craft store had, the bracelet will break under normal wear. This is the single most common cause of a failed first bracelet—and it’s entirely a materials problem, not a skill problem.
- Cutting the cord too short. If you don’t leave enough length for the knot, you’ll have nothing to grip when it’s time to tie. The 4-inch extra allowance is there for a reason — don’t skip it.
- Tying a single overhand knot. It looks like it holds. It doesn’t. On an elastic cord under repeated stretching, a single knot will slip. Use the Surgeon’s Knot described above every time.
- Pulling the knot too hard before it’s seated. The knot needs to be guided into position gently on the first pass, then pulled firm on the second. Yanking it immediately cuts the cord.
What to do after your first bracelet
What to do after your first bracelet
The honest answer: make another one. The first bracelet is where you figure out what length feels right on your wrist and which bead sizes you like working with. The second one is where you start making choices.
If you want to go further—different bead types, color combinations, and patterns—our how to make bracelets with beads guide covers the next layer of technique once you have the basics down.
If you’d rather skip the part where you track down 0.8mm cord at three different stores, our bracelet making kits include the right-thickness elastic, thousands of beads in curated colors, and everything else you need — organized, not dumped in a bag.
Pick your colors, thread the first bead, and see what you make.
Frequently Asked Questions for Beginners
What is the best string to use for homemade bracelets?
For beaded stretch bracelets, 0.8mm elastic cord is the industry standard. It provides the best balance of flexibility and strength. Avoid 0.5mm cord, as it is too thin and prone to snapping under normal wear.
How many beads do I need to make one bracelet?
It depends on the bead size and the wrist size. For a standard 7-inch adult wrist, you will typically need about 28 to 30 beads if you are using 6mm beads. For 8mm beads, you’ll need around 22 to 24.
Why does my elastic bracelet keep breaking?
The three most common culprits are using string that is too thin, pre-stretching the cord unnecessarily before threading, or tying a standard overhand knot instead of a secure surgeon’s knot.
Do I need special tools to make a bracelet at home?
Not for a beaded stretch bracelet. As long as you choose beads with a hole size that fits your 0.8mm cord (like 6mm-8mm acrylic or clay beads), you can thread everything by hand. All you need is scissors and a binder clip.
About this article: Written by Maya Dillon, Founder at Beadlo. Content is based on hands-on kit testing, direct supplier evaluation, and questions collected from our customers. Where conclusions are based on our own observation rather than third-party testing, this is noted in the text. Last reviewed: April 2026
